Manage Guests
When creating a new event, the host can manage the guest list. This function allows the host to control ticket distribution effectively.
Event Templates
Event templates make it easier for hosts to set up guest sign up options in advance, so managing guests is simpler from the start!
There can be multiple of these templates to select. More details can be found here: https://atomcal.com/docs/event-template/
Select Event Template
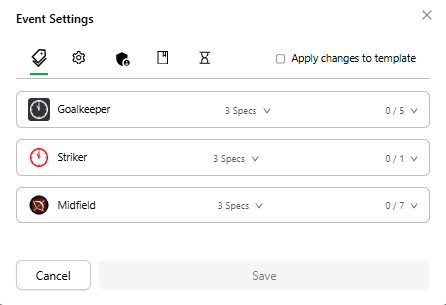
There are various types of templates available, each displaying different ticket types.
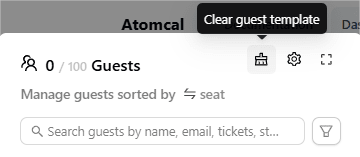
- At the top of the Guest List section, there is a refresh icon. By clicking this icon, the host can delete the existing template and create a new one tailored to their needs.
- The settings icon gives you quick access to create or update event templates, so you can manage template settings without going into calendar settings.
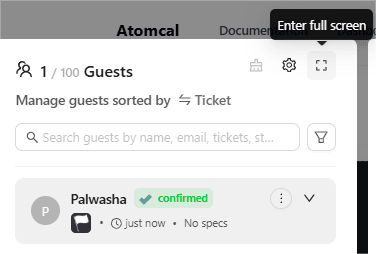
- You can view the guest section in full screen or compact size, depending on what’s more convenient.
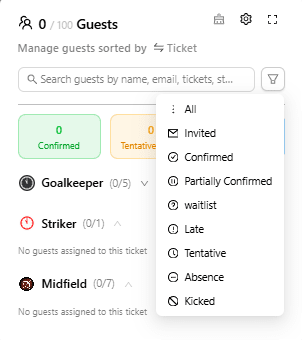
- Guests can be sorted by ticket type or status, making it easier to manage.
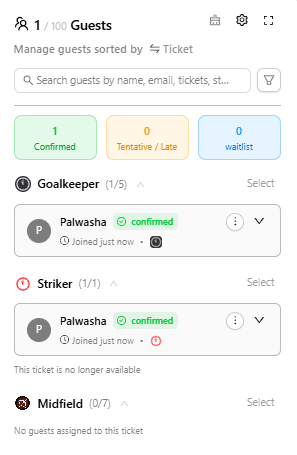
- You will always see the host pinned at the top of the guest list
- Next to the search bar, there is a filter icon that allows the admin to view ticket holders based on their status for example, all confirmed guests.
Additionally, there is an invite Guest option that allows the host to add guests by entering their email addresses directly.
Multiple Tickets
If a guest has more than one ticket, they will appear multiple times on the guest list.
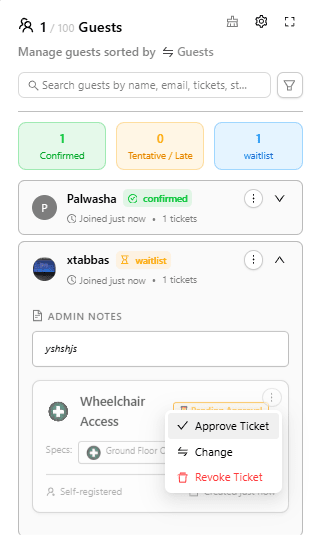
If guest is on the waitlist, they can be approved from the admin side. Guests cannot re-register unless their ticket has been approved.
No Tickets
Don’t worry if you haven’t set up any tickets the register button will appear, so you can collect guest sign ups.
You can also add registration form to gather the details you need, without creating any tickets
Guest profile
The top bar gives you a quick overview of your guest list, you can instantly see how many guests have confirmed, are on the waitlist, or are marked as late.
Clicking into a guest’s profile shows full details,
- How many tickets they are holding.
- Status badges make it easy to spot guest’s current status.
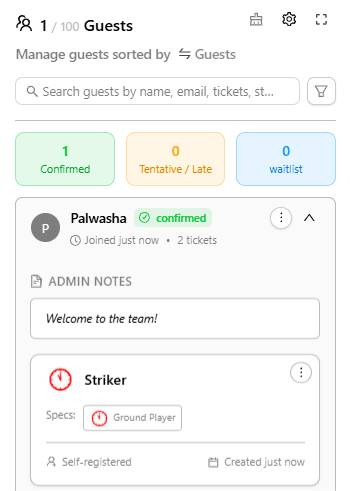
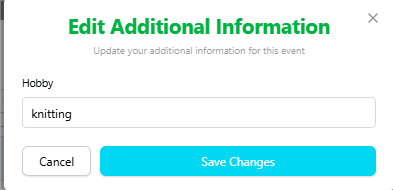
- You can also add admin notes directly above each guest’s ticket section, great for adding a personal touch to make the event more exciting!
- You can see whether the ticket was self-registered by the guest or assigned by a host.
- For extra clarity, timestamps show exactly when tickets were created and accepted.
Guest Registration Flow
When a guest select ticket, a registration form will appear, if it is enabled for the event.
The guest can choose their ticket type, specify ticket details, and fill out the required form fields to complete their registration.
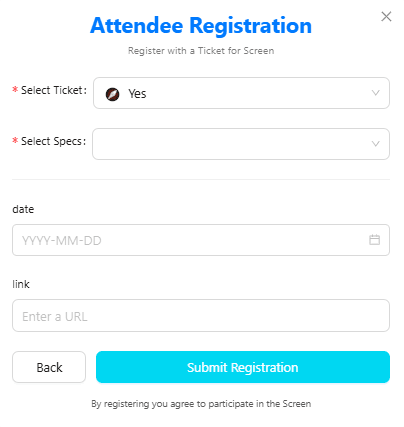
Once the form is submitted and the changes are saved, the selected ticket will be confirmed and shown in the guest management list.
The event owner can easily check custom form responses right from the guest list, just click the guest icon to see their answers, when they were last active, and how many events they have joined.
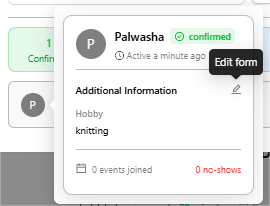
Additionally guests can freely edit their form responses however they like, without affecting their tickets.
Signup Management
Anyone with the event management permission can modify tickets in the ticket holder section. Each ticket has its own status and can be approved/ reject separately.
By clicking on the three dot menu (⋮) displayed on each ticket, the host can perform the following actions:
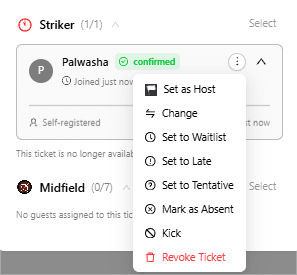
- Set as host – Assign hosting responsibilities to a guest.
- Edit ticket details – Host can modify ticket details, including the ticket type and specifications.
- Set to Waitlist – Move a guest to the waitlist if capacity is full or their ticket is pending approval.
- Set to Late/Tentative – Mark a guest late to show they arrived after the event started.
- Mark as Absent –Indicating that guest did not attended the event.
- Kick – Take a guest off the event list. They won’t be able to attend or use their ticket after this. Use this action if someone was added by mistake, or needs to be removed for any reason.
- Revoke the ticket – This action cancels the ticket and removes the guest access to the event.
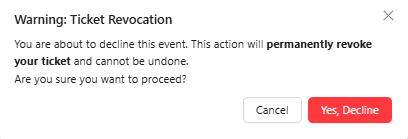
- Decline confirmation – Guests who choose to decline a ticketed event will now see a confirmation modal before it is finalized.